How to Remove a Door Hinge Pin: Quick and Easy Guide
You'll need to remove a door hinge pin whenever you want to take a door off its frame -- to refinish the wood, fix a sag, or squeeze furniture through the opening. The whole job takes under five minutes per hinge with tools you probably already own. But there is a right way and a wrong way, and the wrong way ends with a scratched barrel, a bent pin, or a door on the floor.
Tools You Need
The tool list is short. You need a hammer -- a standard 16-ounce claw hammer is fine -- and something thin enough to fit into the bottom of the hinge barrel. A nail punch (sometimes called a nail set) is ideal: it's a short steel rod with a cupped tip made for this exact job. No nail punch? An 8d finishing nail works. Family Handyman recommends this size because it fits residential hinge barrels without bending under hammer strikes.
Keep a flathead screwdriver nearby. Once the pin head pops up above the barrel, the screwdriver gives you leverage to pry it the rest of the way out. And wedge a book or folded cardboard under the door before you start -- it keeps the door from shifting once the pins come out.
Step 1: Support the Door
Before you touch any pin, make sure the door can't move. Close it all the way and engage the latch so it holds itself in the frame. Then slide a book or a wooden shim under the bottom edge on the latch side. This wedge takes weight off the hinges and stops the door from dropping once you start pulling pins.
Heavy doors need a spotter. A solid-core interior door runs 40 to 50 pounds, and a solid wood exterior door can top 60. That kind of weight tipping from frame height can crack the casing or gouge the floor, so have someone stand by to hold the door steady before you pull the last pin.
Step 2: Tap the Pin Upward
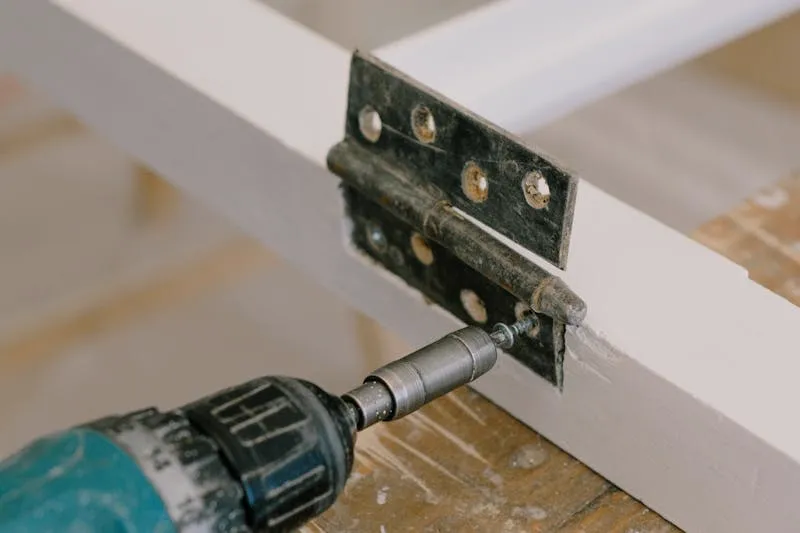
Look at the underside of the lowest hinge knuckle. You'll see the bottom tip of the pin poking through a small opening. Place your nail punch or 8d nail against that tip, angling slightly upward so the force drives the pin out the top of the barrel.
Tap with short, controlled strikes -- two or three light ones should get the pin moving. Once the head clears the top of the knuckle by about half an inch, grab it with your fingers and pull straight out. If it's too tight to grip, slide a flathead screwdriver under the head and pry upward.
One detail most guides skip: keep the nail centered on the pin tip, not off to one side. An off-center hit jams the pin at an angle against the barrel wall. HingeOutlet notes that the correct angle of impact is the difference between a pin that slides out clean and one that fights you the whole way.
Step 3: Remove Pins in the Right Order
Order matters. Always start with the bottom hinge pin, then move to the middle (if the door has three), and finish with the top. The top hinge carries most of the door's weight. Pull it first and the door can twist in the frame or rip the remaining hinge screws out of the wood.
Working from the bottom up keeps the strongest connection intact the longest. Family Handyman adds a useful tip: keep the door closed and latched the whole time, so the latch bolt acts as a third support point.
What to Do When a Hinge Pin Is Stuck
Stuck hinge pins seize for two reasons: rust and dried paint. A pin sitting in the same barrel for a decade or more develops a thin layer of corrosion that bonds the steel surfaces together. Add a coat of paint that bridged across the gap between pin and knuckle, and you've got something that feels welded in place.
Start with penetrating oil. Spray WD-40 or PB Blaster into the top and bottom openings of the barrel, and let it soak for five to ten minutes. The oil seeps into the gap between pin and barrel through capillary action, loosening whatever bond has formed.
Then try the nail-and-hammer method again. Most stuck hinge pins come free on the second attempt. If yours still won't move, switch from a finishing nail to a proper nail punch -- it provides a wider contact surface and won't bend under heavier blows. Deliver firm, deliberate strikes rather than wild swings. Sustained upward pressure works better than a single sharp impact that jams the pin sideways.
HingeOutlet also mentions a specialty lever called a Pin Popper, designed specifically for frozen hinge pins. It's a niche tool, but worth the few dollars if you're renovating an old house with corroded hinges on every door.
Removing a Painted-Over Hinge Pin
A painted-over hinge needs one extra step before the hammer. Take a sharp utility knife and score a line around the pin head where it meets the top of the barrel. Then run the blade along each seam between the knuckle segments. You're cutting through the paint film so the pin and barrel can move independently.
For hinges buried under multiple coats, HingeOutlet recommends sliding a knife blade between the hinge plate and the bottom of the barrel to separate the paint layers at the base. Once the seams are open, apply penetrating oil and tap the pin out normally.
Skipping the scoring step is the main reason people struggle with a painted-over hinge pin. The dried paint forms a sleeve that grips the full length of the barrel, and trying to push through it without cutting it first takes far more force than it should.
Non-Removable Pin (NRP) Hinges
If you look at the hinges on an exterior door and see a small hex-head screw recessed into one knuckle, you've got non-removable pin hinges. That screw locks the pin from the inside and can only be reached when the door is open. The whole idea is that someone outside can't pop the pins.
To deal with it, just open the door and back the set screw out with an Allen wrench. The pin then taps out the same way as any other hinge. Fair warning though -- the set screw is about the size of a grain of rice. I've lost more than one in carpet. Best to thread it back into the knuckle a couple of turns while you work.
Putting the Door Back On
Reinstalling the door reverses the process with one important change: start with the top hinge, not the bottom. Lift the door into position with a helper and line up the top hinge knuckles so the barrel holes align. Push the hinge pin in from the top and tap it down with your hammer until it seats fully.
Move to the middle hinge, then the bottom. If a pin goes in stiff, pull it back out and squeeze some dry graphite powder or a drop of silicone lubricant into the barrel before trying again. WD-40 works in a pinch but attracts dust over time, so graphite or silicone is the better long-term choice for a quiet hinge.
If your reason for pulling the pins was a squeak, check out our guide on how to fix squeaky door hinges for the full rundown on lubricant options and which ones to avoid.
Common Mistakes to Avoid
A few things go wrong more often than they should.
The most common mistake is prying the hinge pin sideways with a screwdriver or butter knife. This scratches the barrel, bends the pin, and often ends with scraped knuckles. The bottom-up tap method works with the pin's design, not against it.
Hitting too hard on the first strike is another one. Start light. An oversized first blow can drive the pin at an angle and wedge it in the barrel. You can always hit harder on the next tap -- you can't easily un-jam a crooked pin.
And always support the door before starting. It drops the moment the last pin clears. Even a hollow-core door falling from frame height can crack trim or catch a toe.
Get our door hardware maintenance checklist -- a printable guide to keeping every hinge, latch, and strike plate in your home quiet and working smoothly.
References
- "How to Take a Door off the Hinges." Family Handyman. Updated October 7, 2024.
- "How to Remove a Door Hinge Pin." wikiHow. Co-authored by Gino Colucci. Updated July 12, 2025.
- "How to Remove a Stuck Door Hinge Pin." HingeOutlet.
- "How to Remove Door Hinge Pins the Right Way." HingeOutlet.
- "How to Quiet a Squeaky Door." This Old House.
- "How to Fix a Squeaky Door." Bob Vila.
- "How to Remove a Door Hinge Pin In Minutes." Angi.
- "How to Silence a Squeaking Hinge." Family Handyman.