How to Fix a Sagging Door: A Step-by-Step Guide
A sagging door drags on the floor when you try to close it. Left alone, it gets worse -- the latch stops catching, the bottom corner gouges the threshold, and eventually the door won't shut at all. The good news is that most sagging door repairs cost nothing and take under 30 minutes with a screwdriver and a few screws. Below are six methods to fix a sagging door, ordered from simplest to most involved. Try them in order and stop at the one that works.
Common Causes of a Sagging Door
Nearly every sag traces back to the top hinge. Gravity pulls the free end of the door downward every time you open it, and that force concentrates on the screws holding the top hinge to the frame. Over months and years of daily use, those screws loosen or strip out of the wood, allowing the top corner to drop and the bottom corner on the latch side to drag.
A standard hollow-core interior door weighs roughly 25 to 30 pounds, while a solid-core or exterior door can weigh 50 pounds or more. Heavier doors strip hinge screws faster, especially when children hang or swing on the door.
Beyond loose screws, four other factors cause doors to sag:
- Stripped screw holes -- the wood fibers around the screw have been crushed and the threads can no longer grip.
- House settling -- as a foundation shifts over the years, door frames move out of square, changing the gap between door and frame.
- Paint buildup under the hinge -- layers of paint or stain that seeped under the hinge leaves act as spacers, pushing the door out of alignment.
- Worn hinge knuckle -- the barrel that holds the pin develops play after years of use, allowing the door to shift downward.
Method 1: Tighten the Hinge Screws
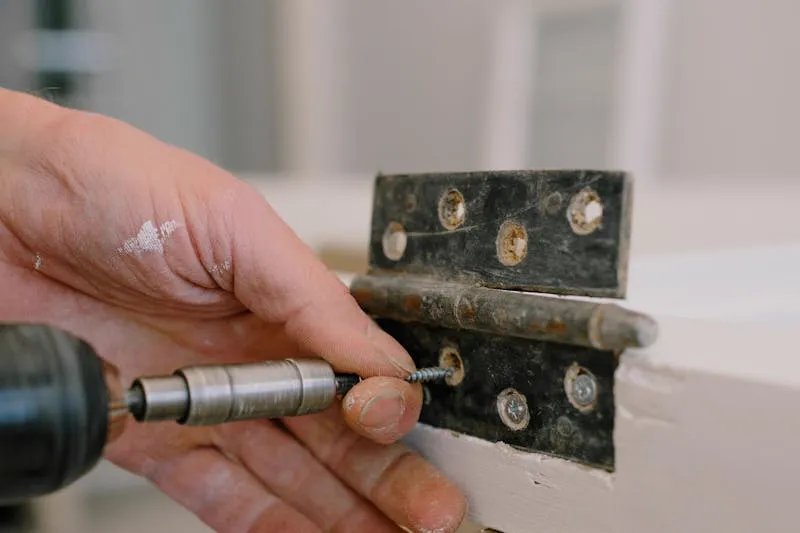
Start with the simplest fix. Open the door and examine the top hinge. Using a screwdriver -- not a drill, which risks stripping the holes -- tighten every screw on both the door-side leaf and the frame-side leaf of the top hinge. Screws loosen gradually, and in many cases one or two have backed out by a quarter-turn or more. Simply snugging them pulls the door back into alignment.
Check the middle and bottom hinges as well. A loose screw on any hinge contributes to misalignment, but the top hinge carries the most load and is almost always where the problem starts.
Method 2: Drive a 3-Inch Screw Into the Stud
If tightening alone does not fix the sagging door, replace one of the top hinge's frame-side screws with a 3-inch screw. Standard hinge screws are about 1 inch long and only penetrate the door jamb. A 3-inch screw passes through the jamb and bites into the wall stud behind it, pulling the hinge and the entire door frame tighter against the structural framing.
Remove a screw near the middle of the hinge rather than the top or bottom screw. Drive the 3-inch screw with a drill until it sits snug against the hinge, then give it a final quarter-turn with a screwdriver. Close the door and check the fit. Use only one 3-inch screw per hinge -- installing more can pull the frame out of alignment and open gaps at the trim joints.

Method 3: Fill Stripped Screw Holes
When a screw spins freely and refuses to grip, the hole is stripped. Two reliable methods fix this:
Toothpick method. Remove the screw, coat two or three wooden toothpicks in wood glue, pack them into the hole, and snap them off flush with the surface. Let the glue dry for at least one hour, then re-drive the original screw. The toothpicks give the screw threads fresh wood to bite into.
Wood dowel method. This holds up better on heavy doors. Drill out the stripped hole with a 3/8-inch bit, glue a 3/8-inch dowel in, and tap it flush. Wait at least an hour for the glue to set. Then drill a 1/8-inch pilot hole through the center of the dowel and drive your screw into it. You end up with a solid wood plug instead of a bundle of toothpicks, which matters when the door weighs 50 pounds or more.
Method 4: Shim the Hinge
If the sag is caused by a hinge mortise that was routed too deep -- meaning the hinge leaf sits below the surface of the jamb -- shimming brings it back to the correct depth. Remove the hinge from the frame, cut a piece of thin cardboard (a cereal box works well) to match the shape of the hinge leaf, place it in the mortise, and reattach the hinge over the shim.
A single layer of cardboard provides about 1/16 inch of correction, which is enough for most minor sags. Stack two layers for more severe misalignment. Place the shim behind the top hinge to lift the latch side of the door. If the door binds at the top of the latch side, shim the bottom hinge instead -- this pushes the bottom of the door toward the hinge side and opens the gap at the top.
Shimming corrects a mortise depth problem, not a loose screw problem. If the screws are also stripped, shim the mortise and then drive a 3-inch screw for a permanent fix.
Method 5: Remove Paint Buildup
Paint or stain that accumulated under the hinge leaves over multiple coats acts as a spacer, pushing the hinge away from the jamb and throwing the door out of alignment. Remove the top hinge and use a sharp wood chisel or 5-in-1 tool to scrape away the paint from the mortise, bringing the surface back to bare wood. If the hinge itself is painted over, use a utility knife to cut around the hinge leaf before removing it to avoid tearing the surrounding paint.
Reinstall the hinge and test the door. This fix often works in combination with tightening the screws -- paint buildup loosens the fit gradually, and the screws become the symptom rather than the cause.
Method 6: Replace the Hinges
Sometimes the hinge itself is the problem. If you grab the door near the top hinge and can wiggle it -- even slightly -- the knuckle has worn out and no screw trick will fix it permanently. Other signs worth watching for:
- The hinge leaves are visibly bent. Hold a straightedge across the plate to check.
- Pitting on the pin surface, which you'll feel as roughness when you pull the pin out. Corrosion like this is common on bathroom doors.
- Two or more stripped screw holes on the same hinge. At that point the plate can't sit flat.
Take the old hinge to the hardware store so you can match the size exactly. Interior doors (1-3/8 inches thick) use 3.5-inch butt hinges; exterior doors (1-3/4 inches thick) need 4-inch hinges. Reinforce any damaged screw holes with the dowel method before you install the replacement. And if you also need to fix squeaky door hinges, lubricate the pin while you have everything apart.
When to Call a Professional
Most sagging door repairs are straightforward DIY work. However, if the door frame is visibly out of square and the gap between the door and frame varies by more than a quarter inch from top to bottom, the problem likely goes beyond what hinge adjustments can correct. Foundation settling or structural movement can push an entire frame out of alignment, and a carpenter or general contractor can assess whether the frame needs to be rehung or the underlying structure needs attention.
Also consider professional help for solid wood exterior doors that have warped significantly. Planing or resizing a warped exterior door requires precision to maintain the weatherseal, and the door-to-jamb gap should remain about 1/8 inch -- roughly the thickness of a nickel.
Preventing Your Door from Sagging Again
The fix only lasts if you do a little maintenance afterward. Once a year, walk around the house and give each hinge a quick check -- any screw that turns easily needs a snug. For bathroom and exterior doors, paint or seal all six sides (including the top and bottom edges that nobody sees). Those unsealed edges absorb moisture, and moisture is what causes wood to swell in summer and shrink in winter. A dehumidifier in a humid climate does more for your doors than you'd expect.
Get our door hardware maintenance checklist -- a printable guide to keeping every hinge, latch, and strike plate in your home quiet and working smoothly.
References
- "How to Fix a Sagging Door." The Spruce. Updated December 11, 2025.
- "How to Fix Sagging or Sticking Doors." Family Handyman. Updated July 27, 2023.
- "How to Fix Loose Door Hinges with Stripped Screws." This Old House. Updated May 17, 2025.
- "How to Fix a Sticking Door." Bob Vila. Updated October 7, 2020.
- "How to Fix a Sagging Door in 4 Easy Steps." Mr. Handyman.
- "Most Common Door Problems and How to Fix Them." Lowe's. Updated June 28, 2024.
- "A Complete Hinge Size Guide." DK Hardware.
- "How to Fix a Sagging Door: Step-by-Step Guide." Plastpro.